Mom's Lifesavers

Come to Mom, she will get the word out.

  • Work With Us
    • Editorial Consideration
    • Brands & Company Partnerships
  • Client Portfolio & Social Media Management
  • Reviews
    • Business Reviews
    • Product Reviews
    • Book Reviews
  • Mompourri
    • Health
    • Household
    • Mommy Musing
    • Money and Savings
    • Parenting
    • Technology
    • Throwback Thursdays
    • Travel
      • Day trips
      • Places
      • Mom’s Night Out
    • DIY
      • Crafts
      • Printables
      • Seasons
    • Recipes
      • Slowcooker
      • Fast and Easy
      • Sweet
    • Parents & Children
      • Gear and Toys
      • Celebrations
      • Infant
      • Toddler
      • School Age
      • Teen
  • About Us
    • Christine Cohen
    • Bonnie Bowes
    • Contact
    • Disclosure Policy

DIY – Mini Figure Display

July 10, 2013 By: Bonniecomment

Make Your Own Display Rack!Got bricks? We do!


We have more Mini Figures than I know what to do with – so my son and I built this easy DIY display to show off his favorites.


Here is what you need:

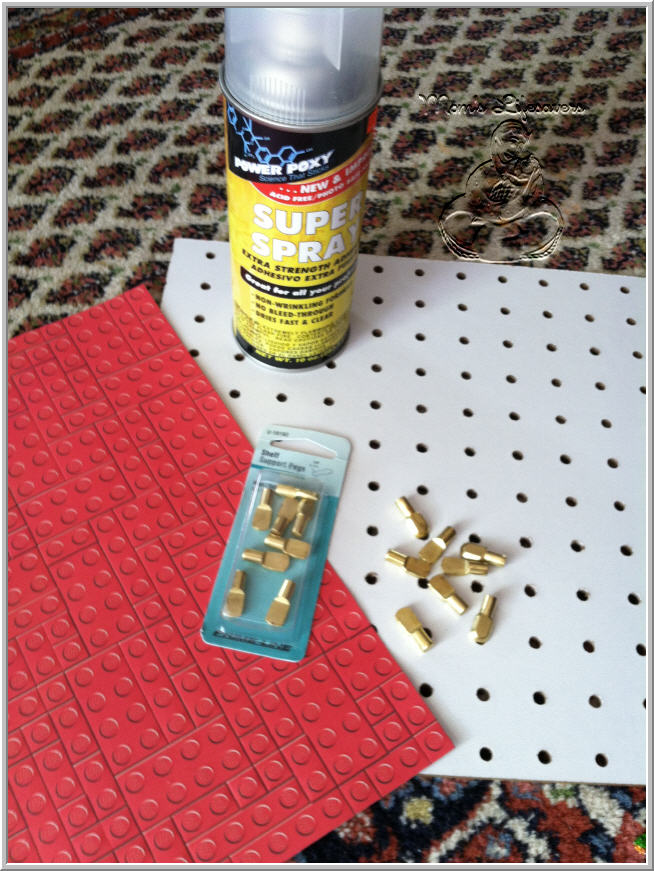
* Pegboard – we had the nice guy at the giant hardware store cut us a piece to 12″x12″ – (TIP – Why? Because that is the same size as scrapbook paper!)

* Decorative paper – we used Lego Brand scrapbook paper

* Spray glue/adhesive (glue sticks will work to – just be sure to glue both the board and the paper for a good bond)

* Shelving Pegs – these are in the hardware odds and ends aisle.

* Super glue – we started with the traditional super glue but ended up using Gorilla Glue too – we felt the Gorilla Glue worked best.

* Clamps or clothes pins to hold the base plates to the pegs while the glue dries
* Mini Figures to display.

* A Hanger – we used some chain from the jewelry supply area – you can also use parachute cord, wire, ribbon or string.

Let’s Get Started!


First step – glue your paper to the peg board and let it dry. Next measure out where you want your shelf pegs to go – we worked on the back so we could see where the holes would be and places a small hole  in the paper.

Next, place a shelf peg in the hole you made with the shelf peg facing out. Add a drop of glue and then the black base plate to the shelf peg. 

TIP – this is where we used the clamp to hold the base plate to the shelf peg while it dried – we let it dry over night when we used the Gorilla Glue.
Adding the glue to the shelf peg.

Place the base plate on top of the shelf peg and let it dry.

Here are the clamps holding the base plates to the shelf pegs

Once all the plates are secured it is time to start adding your miniature figures to the display board!
To hang the board us wire, chain, yarn or ribbon – thread it through 2 holes at the top of the board and you have your self a one of a kind display for all those Mini Figs!
Have fun with it!

We are on YOUTUBE!  Check out our DIY crafts and FUN Paracord Flip Flop Tutorial that has over 2,000 views!
Follow us on TWITTER and FACEBOOK!

Leave a Reply Cancel reply

Your email address will not be published. Required fields are marked *

Follow Us:

  • Email
  • Facebook
  • Google+
  • Instagram
  • LinkedIn
  • Pinterest
  • RSS
  • Twitter
  • YouTube
Moms Lifesavers

Christine Cohen & Bonnie Bowes
Principals of the
Mom's Lifesavers Network

Red Sox Parents 2017

#RedSoxMoms

#RedSoxMoms

Rockport Travel Page

Rockport Travel Page

Rockport Community Page

PBS Crafts for Kids

PBS Crafts for Kids

Party Posts Featuring

Oriental Trading Company

Proud Partner

Blog Post List

#RedSoxMoms

Mom's Lifesavers

Featured Bloggers on Boston Moms

Boston Moms

Copyright © 2025 · Moms Life Savers By, Pretty Darn Cute Design