Mom's Lifesavers

Come to Mom, she will get the word out.

  • Work With Us
    • Editorial Consideration
    • Brands & Company Partnerships
  • Client Portfolio & Social Media Management
  • Reviews
    • Business Reviews
    • Product Reviews
    • Book Reviews
  • Mompourri
    • Health
    • Household
    • Mommy Musing
    • Money and Savings
    • Parenting
    • Technology
    • Throwback Thursdays
    • Travel
      • Day trips
      • Places
      • Mom’s Night Out
    • DIY
      • Crafts
      • Printables
      • Seasons
    • Recipes
      • Slowcooker
      • Fast and Easy
      • Sweet
    • Parents & Children
      • Gear and Toys
      • Celebrations
      • Infant
      • Toddler
      • School Age
      • Teen
  • About Us
    • Christine Cohen
    • Bonnie Bowes
    • Contact
    • Disclosure Policy

Day of the Dead Light Up Mask – DIY

October 25, 2019 By: Bonniecomment

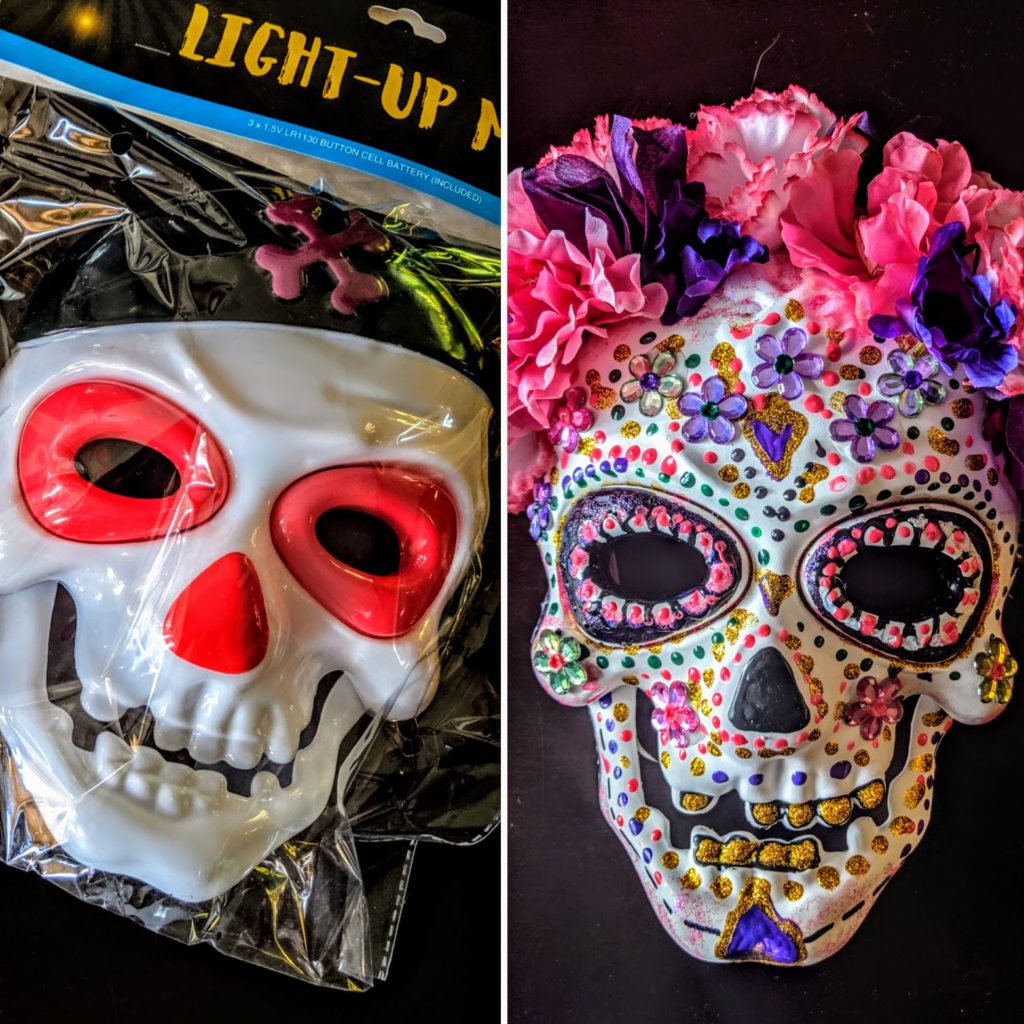
We love seeing all of the Halloween decor and costume inspiration from Dia Los Muertos – Day of the Dead – this time of year. When we came across this $1 light up skeleton pirate mask at Dollar Tree we knew it would be perfect for a colorful Day of the Dead mask!

Turn your mask on and turn heads with this one of a kind DIY Day of the Dead mask.
DollarTree supplies transform this pirate skeleton mask.

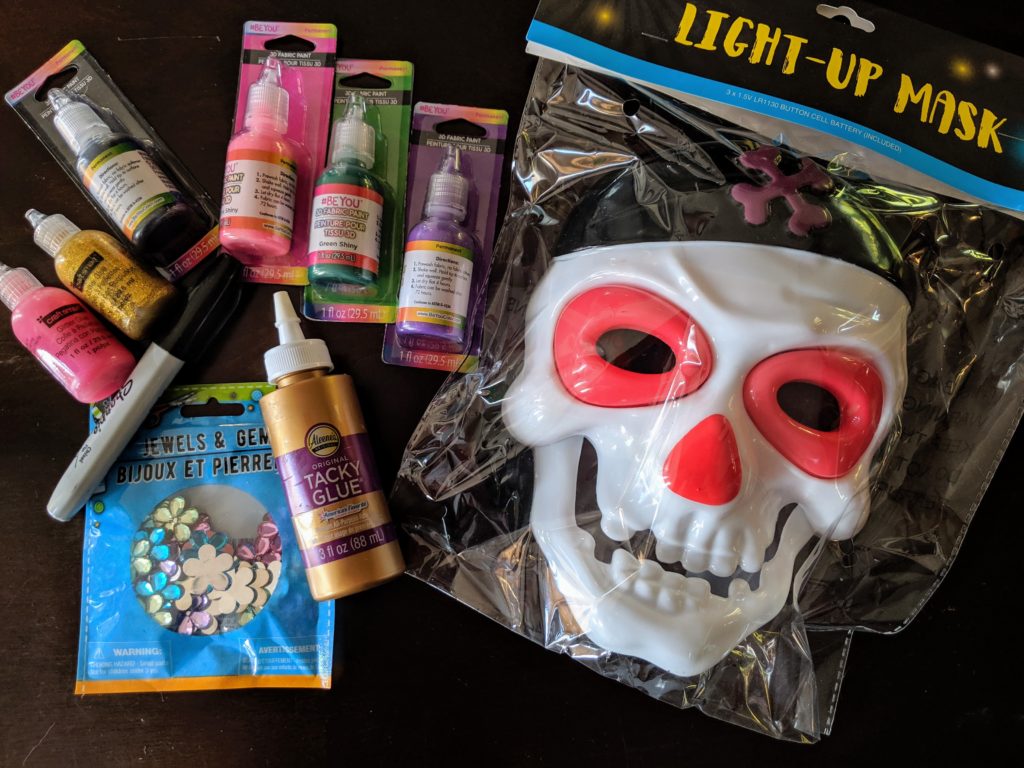
Here is what you need for supplies (we purchased our at Dollar Tree):

  • Light up mask
  • Color fabric paint & glitter glue
  • Arlene’s tacky glue
  • Black permanent marker
  • Artificial flowers
  • Other – we had these items at home: white spray paint or primer, hot glue, scissors, covered surface

Getting Started

Collect all your supplies and cover your work surface to protect it from all the glue and paint goodness that comes with crafting.

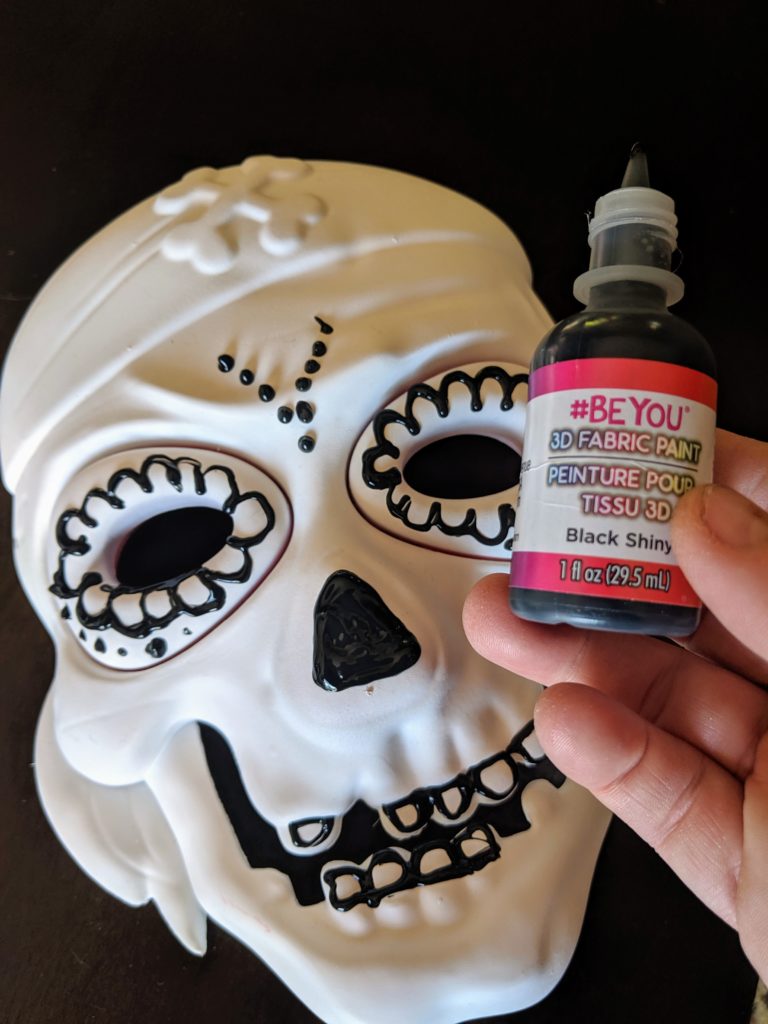
Remove the mask from the packaging and spray with a coat of primer or white paint. You can also cover it with paint and a brush but using a spray paint goes so much faster!

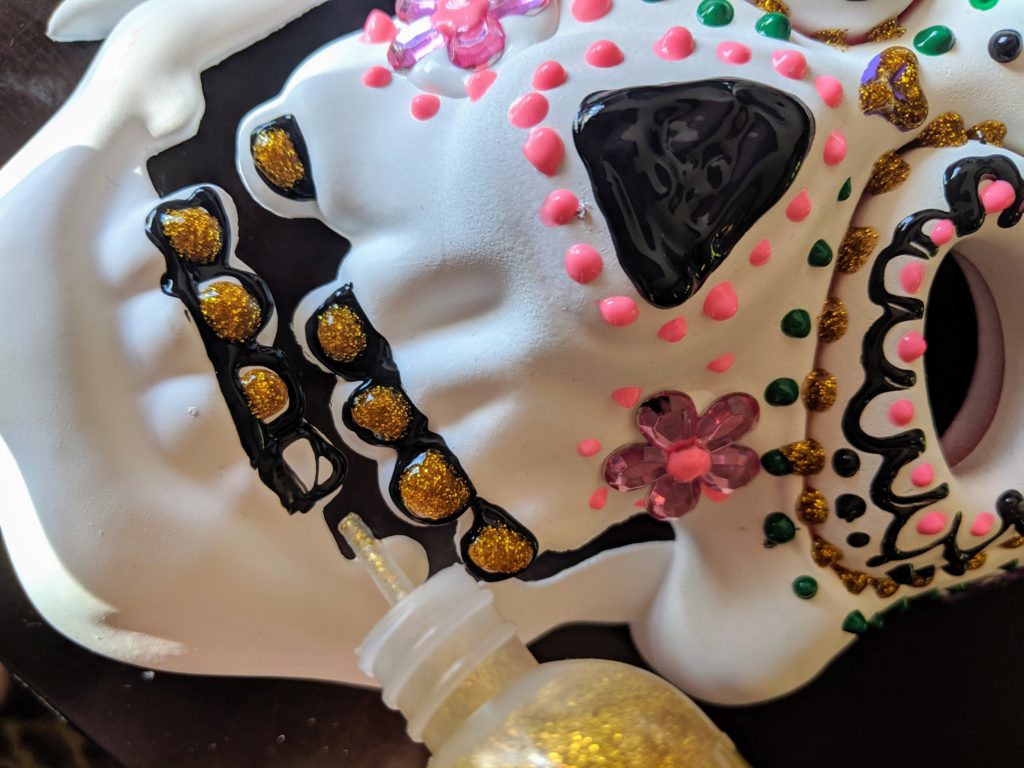
Once you have your dry skeleton mask its time to get creative! We started with the black, slick, fabric paint. We liked it because it is slightly raised and shiny.

Start with outlines to the eyes, nose (fill in) and the teeth.

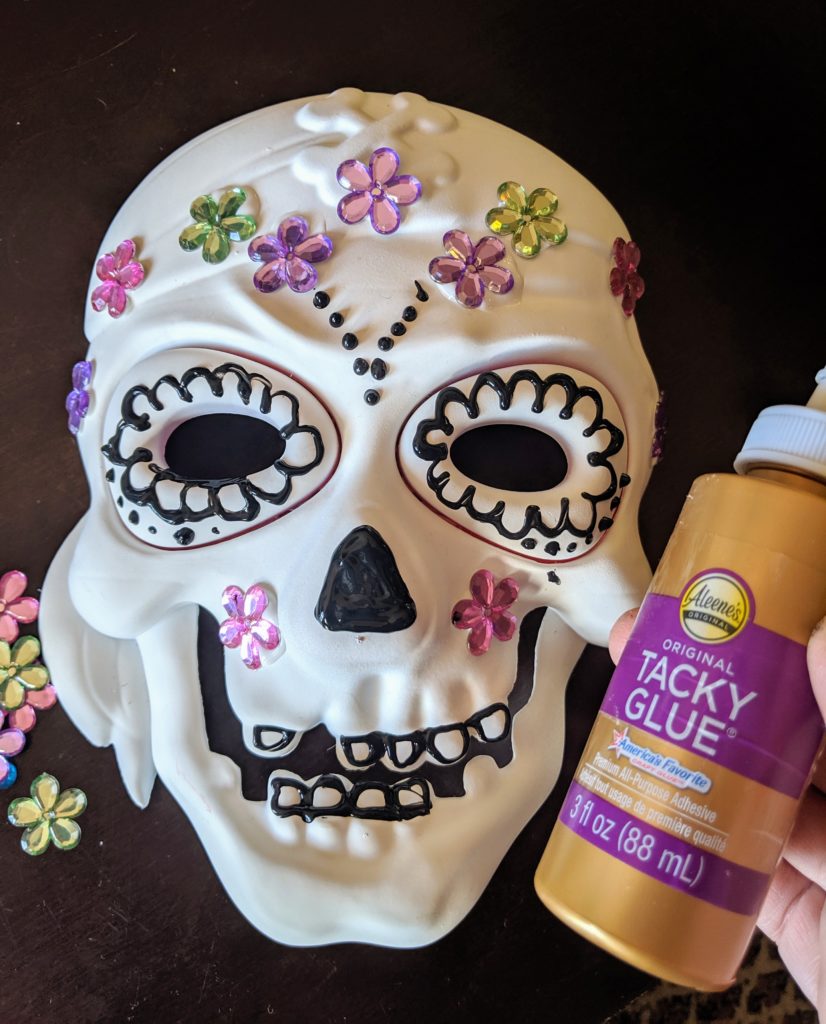
Next while that dries, grab your tacky glue and the floral jewels. These can be added anywhere around the mask .

Day of the Dead Mask DIY Craft

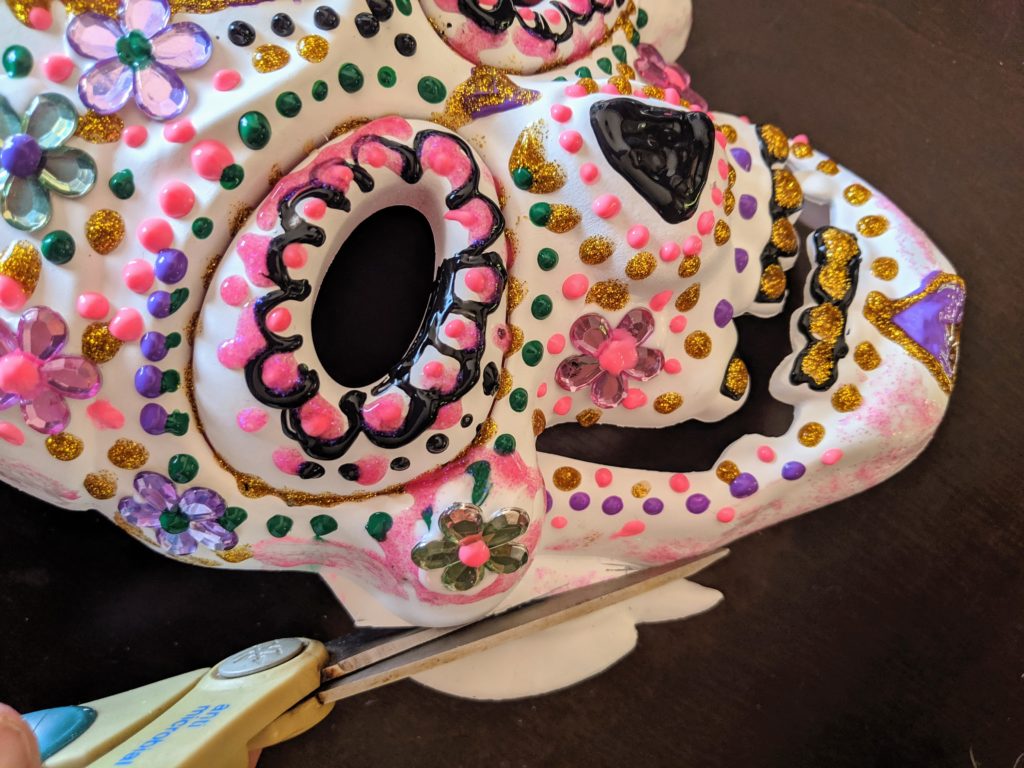
While the glue dries its time to start adding colorful dots, dashes, and more to bring your mask to life! There is no wrong way to decorate when it comes to these masks – enjoy and have fun!

We filled in the teeth with gold glitter glue and added some around the eyes too!

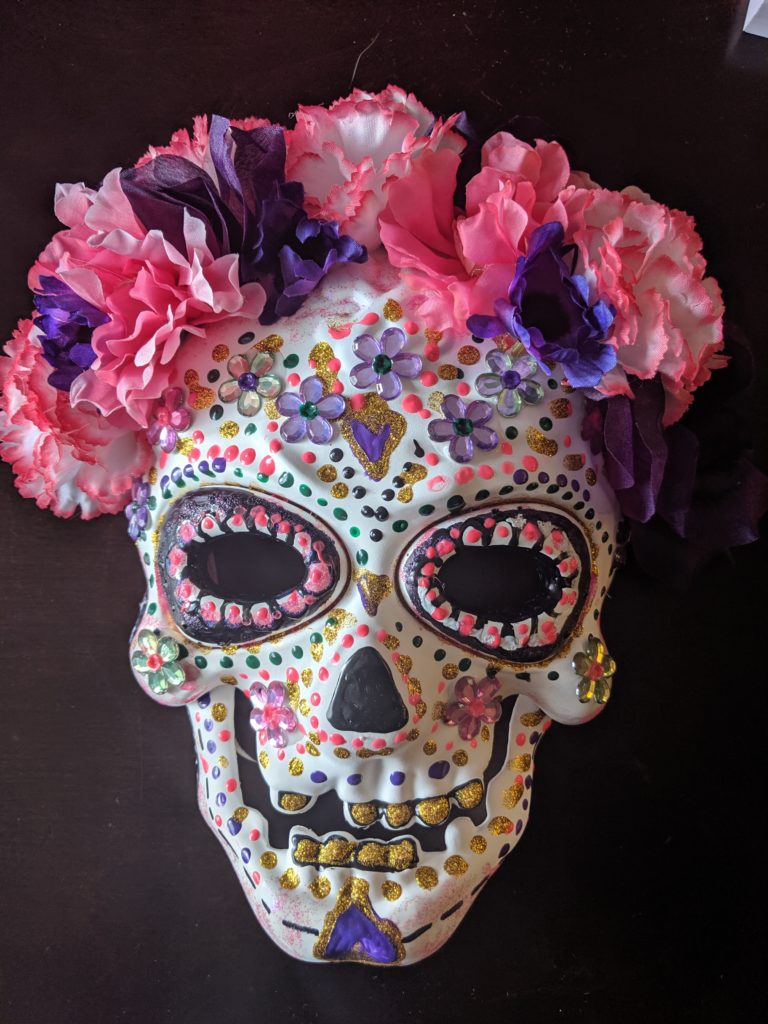
We trimmed the edge of the mast where the pirates bandanna was to even the face out a bit using scissors. When your project has dried it’s time to add a floral headband to the top. We used a variety of artificial flowers and added them using a hot glue gun.

Trim the excess off with scissors or add a flower!

Leave a Reply Cancel reply

Your email address will not be published. Required fields are marked *

Follow Us:

  • Email
  • Facebook
  • Google+
  • Instagram
  • LinkedIn
  • Pinterest
  • RSS
  • Twitter
  • YouTube
Moms Lifesavers

Christine Cohen & Bonnie Bowes
Principals of the
Mom's Lifesavers Network

Red Sox Parents 2017

#RedSoxMoms

#RedSoxMoms

Rockport Travel Page

Rockport Travel Page

Rockport Community Page

PBS Crafts for Kids

PBS Crafts for Kids

Party Posts Featuring

Oriental Trading Company

Proud Partner

Blog Post List

#RedSoxMoms

Mom's Lifesavers

Featured Bloggers on Boston Moms

Boston Moms

Copyright © 2025 · Moms Life Savers By, Pretty Darn Cute Design