
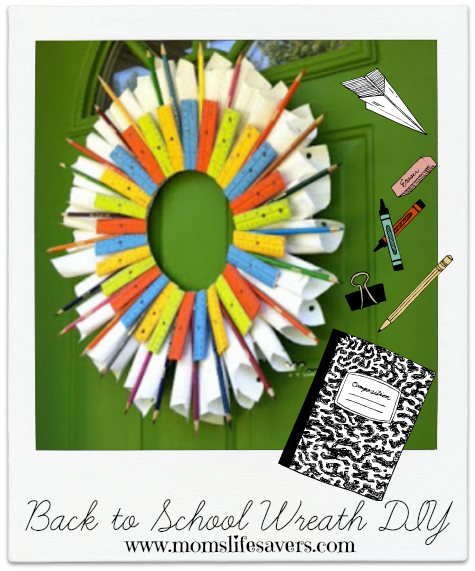
Back to School Wreath – DIY
You Can Make It Too! Easy Decoration!
While out shopping the other day there were already Halloween & Thanksgiving decorations out.
I need to ease into the season a little more slowly – after all I think summer goes through Columbus Day here in New England, not Labor Day!
And … I still have my patriotic wreath on the door.
I came across these great wooden rulers at The Christmas Tree Shops for $.39 each – they inspired this simple school supply wreath.
(Using basic math that’s 3 ruler pieces at 4″ each in every 12″ ruler! I love inexpensive supplies!
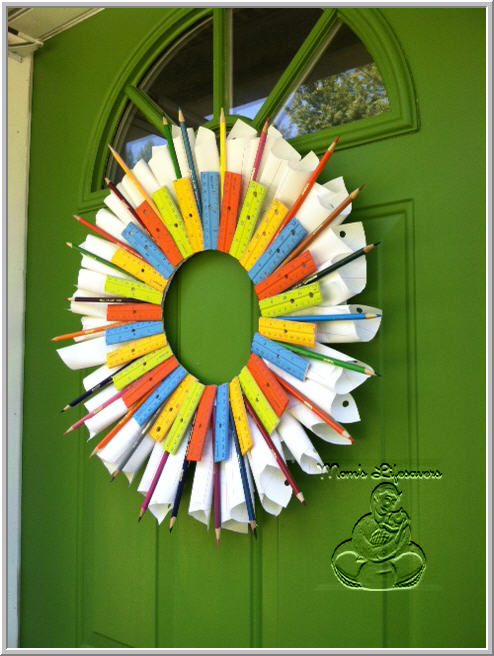
Back to School Wreath by Mom’s Lifesavers
Recipe for this craft:
- Wooden rulers (I used 4 of each color, cut every 4″)
- Lined filler paper
- Last year’s colored pencils
- 12″ wire wreath (for base)
- Stapler & Staples
- Hot Glue Gun & Glue Sitcks
Getting Started!
Gather all your supplies
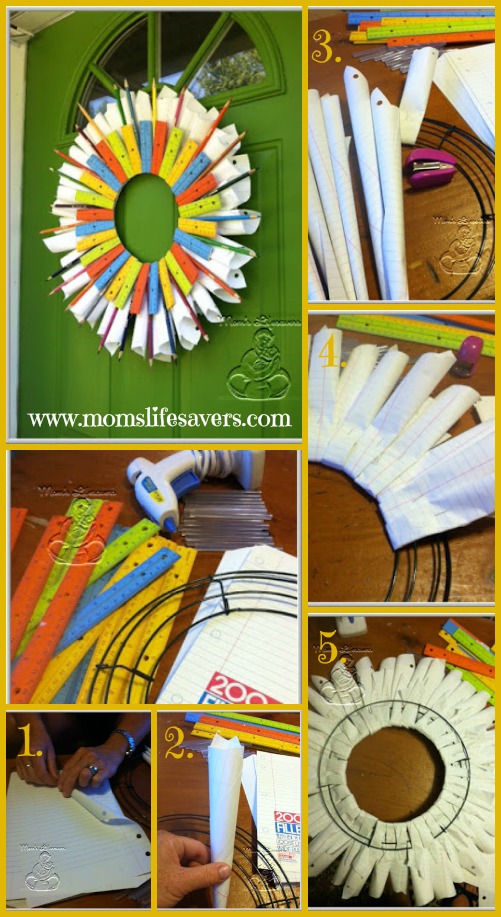
- Start rolling the paper
- These rolled cones of paper will be the background of the wreath
- Once you have a bunch made, grab the stapler and fold each cone ‘into the wire frame’ – I did this by folding it under the inside circle of the frame and then back up through the frame before the last outside wire.
- Staple in place.
- I ended up stapling some closer than others, as no two paper cones were the same size or width – have fun with it, it doesn’t have to be perfect!
Back to School Wreath by Mom’s Lifesavers
Here is a shot from the back (Step 5) and the front (Step 6) – look close – you’ll see my mistakes, haha!

Back to School Wreath by Mom’s Lifesavers
7. Next start with the front of the wreath and start hot gluing the ruler pieces around – I worked in a pattern.
Once the rulers were in place I felt it needed something more … but what?
It was my 7 year old daughter that said, “How about my pencils from last year?” She ran and got her school supply box that came home in June.
We sharpened up the pencils and added them as ‘rays’ to the wreath.
Have fun with it!


Leave a Reply