Mom's Lifesavers

Come to Mom, she will get the word out.

  • Work With Us
    • Editorial Consideration
    • Brands & Company Partnerships
  • Client Portfolio & Social Media Management
  • Reviews
    • Business Reviews
    • Product Reviews
    • Book Reviews
  • Mompourri
    • Health
    • Household
    • Mommy Musing
    • Money and Savings
    • Parenting
    • Technology
    • Throwback Thursdays
    • Travel
      • Day trips
      • Places
      • Mom’s Night Out
    • DIY
      • Crafts
      • Printables
      • Seasons
    • Recipes
      • Slowcooker
      • Fast and Easy
      • Sweet
    • Parents & Children
      • Gear and Toys
      • Celebrations
      • Infant
      • Toddler
      • School Age
      • Teen
  • About Us
    • Christine Cohen
    • Bonnie Bowes
    • Contact
    • Disclosure Policy

Sharpie Tie Dye – You Can Do It Too!

May 17, 2013 By: Bonniecomment

Want to have some fun creating a tie dye effect without all the mess?  
How about using some of your marker collection to design your own shirt?


Here is what you need:
– Sharpie markers

TIP -wider tips work better than fine point

 – rubbing alcohol

– rubber bands/elastics

– eye dropper or syringe

– cups and or bowls

– cutting board or cardboard surface to go in between your shirt layers
– cotton t-shirt

Step 1 – Start by putting your cutting board or cardboard inside your t-shirt.
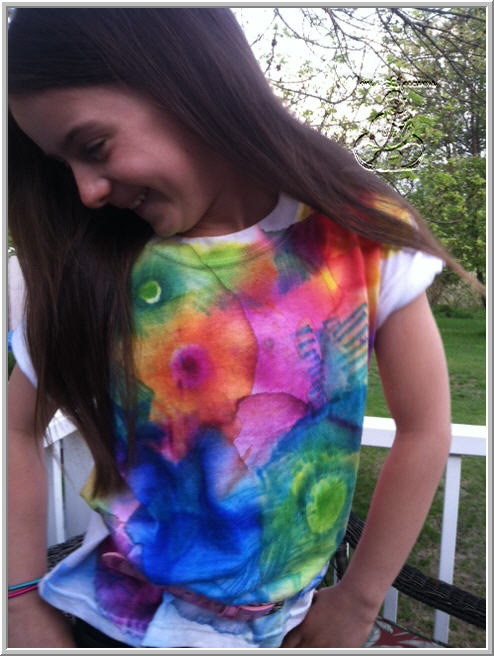
Step 2 – Next step – get crazy with those markers!

TIP – Concentric circles work the best to give you that traditional tie dye effect but shapes and lines will blur and blend to create  unique designs. 

Step 3 – Once you have the design the way you like it take a portion of the shirt and stretch it over the top of a cup, use an elastic to hold it in place. Once in place, add a full dropper of rubbing alcohol to the shirt – it will bleed and spread the color into the stretched shape.

TIP – You can use multiple cups/bowls at the same time

TIP – VENTILATION! You are using alcohol and ventilation is important – we colored the shirt inside but moved the ‘dying’ outside.

Step 4 – Allow the shirt to dry completely – and then you can launder as you like – I recommend washing in cold to keep the colors vibrant but our designs have ended up in a hot cycle and turned out fine.

Have fun with it!
  
We would love to see your designs 
– share them with us on Facebook!

Leave a Reply Cancel reply

Your email address will not be published. Required fields are marked *

Follow Us:

  • Email
  • Facebook
  • Google+
  • Instagram
  • LinkedIn
  • Pinterest
  • RSS
  • Twitter
  • YouTube
Moms Lifesavers

Christine Cohen & Bonnie Bowes
Principals of the
Mom's Lifesavers Network

Red Sox Parents 2017

#RedSoxMoms

#RedSoxMoms

Rockport Travel Page

Rockport Travel Page

Rockport Community Page

PBS Crafts for Kids

PBS Crafts for Kids

Party Posts Featuring

Oriental Trading Company

Proud Partner

Blog Post List

#RedSoxMoms

Mom's Lifesavers

Featured Bloggers on Boston Moms

Boston Moms

Copyright © 2026 · Moms Life Savers By, Pretty Darn Cute Design