
Mom’s Lifesavers shows you how to repair outer wear without sewing.
It has been a tough winter and the kids outer wear has taken a beating time for some outer wear repair.
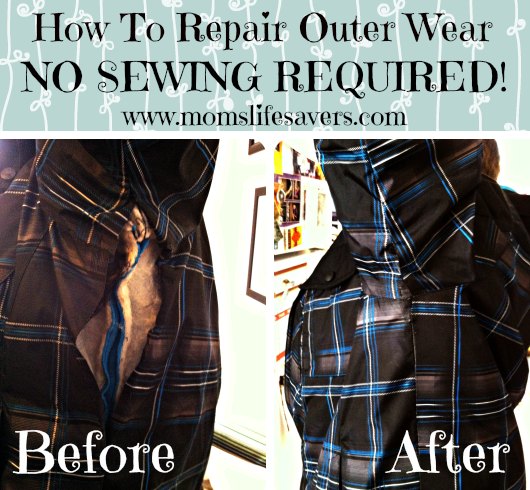
Sledding, skiing, skating, hockey and more – I was really hoping we could get another season out of our son’s new jacket.
Imagine my surprise when he lifted his arm the other day and the entire seam had come undone. Time for some outer wear repair!
I stopped at JoAnn’s Fabrics and Crafts for a solution. I didn’t want to sew it since the material is a nylon blend. I thought a patch might work but would by unsightly and my tweenager would definitely not like the look of that.
I ended up purchasing some Stitch Witchery for black and dark fabrics – the perfect no sew, outer wear repair solution!
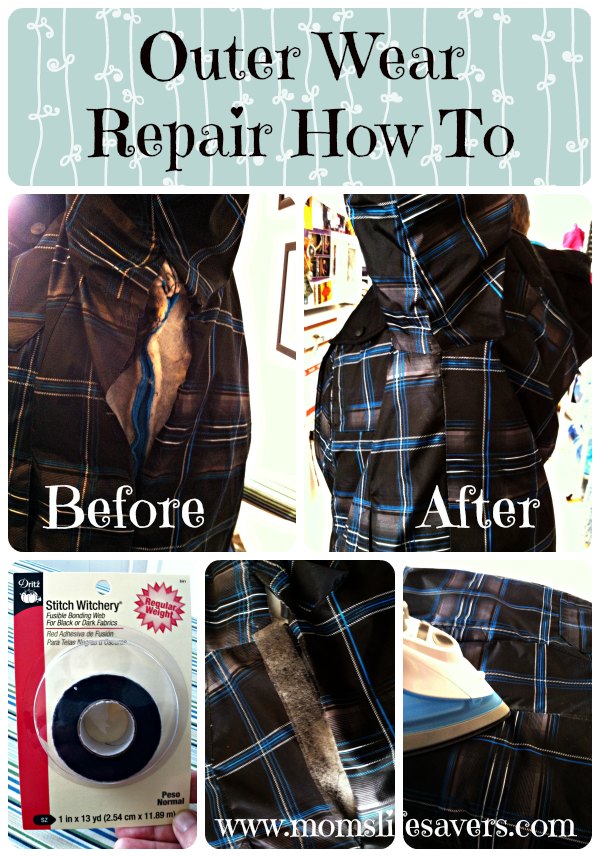
Stitch Witchery comes in various widths and for light and dark fabrics and is perfect for outer wear repair – we found ours at JoAnn Fabrics and Crafts – you can also find it on Amazon and in the sewing aisle of some big box stores.
Getting Started
- Clean the seam or area that you are repairing, making sure it is free of extraneous threads
- Cut the Stitch Witchery to the desired length of the area that you want to seal/close
- Heat your iron setting to steam – be sure to test and area of the fabric to make certain you don’t have the setting too hot – you want to be able to steam the area to melt the Stitch Witchery but not so hot as to burn your fabric
- Place the Stitch Witchery inside the seam, creating a ‘fabric sandwich’ with the Stitch Witchery as the filling, it will act as bonding agent once it melts
- Iron the area, steaming the seam
- Allow area to cool – all set, ready to wear!


Leave a Reply