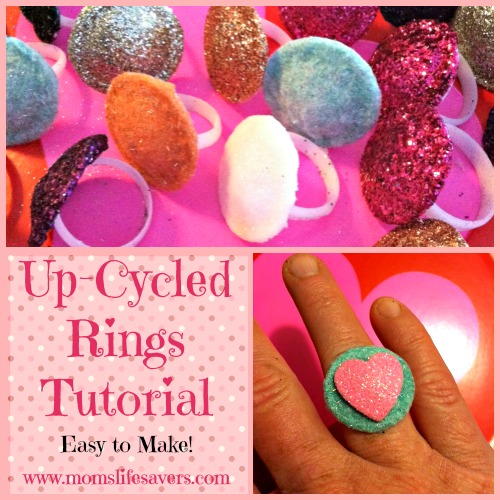
Upcycled Rings are a Fun Craft for Kids!
UpCycled Rings Tutorial Moms Lifesavers
These sparkly fun rings are actually made from juice and milk bottle tops and a little (err umm a LOT) of glitter.
Gathering Your Supplies
This is one of those crafts that is fun to make in a batch, so start saving your bottle tops. You will be surprised just how quickly they add up and how many products they are on. We made a little collection of them in our ‘junk drawer’ and pulled them out for this project. We thought they would make fun Valentines for classmates – what do you think?
UpCycled Rings Tutorial Moms Lifesavers
What You Need
- Tacky glue – something heavier than school glue. We used Elmer’s Glue All, Arlene’s Tacky Glue also works great.
- Glitter and Sparkly Fuzz (used in card making)
- Glue gun
- Scissors
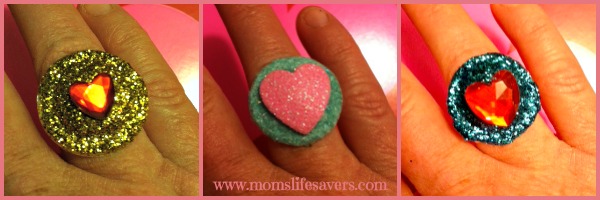
- Adhesive gems and stickers for added sparkle (We purchased ours at Dollar Tree)
- Paper cup for glue and shallow dish for glitter
Preparing Your Work Space
When working with glue and glitter it is in your best interest to cover your table or works space with newspaper or a plastic table cover – something that you can dispose of when all is said and done.
UpCycled Rings Tutorial Moms Lifesavers
UpCycled Rings Tutorial Moms Lifesavers
Steps
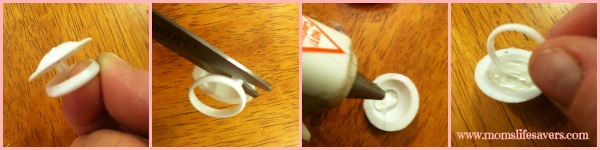
- Prepare the rings. Trim the ‘ring’ from the plastic stopper, keeping the open circle intact.
- Using hot glue, place a dab in the bottom, inside of the cap and place the ring into the glue to hold it into place.
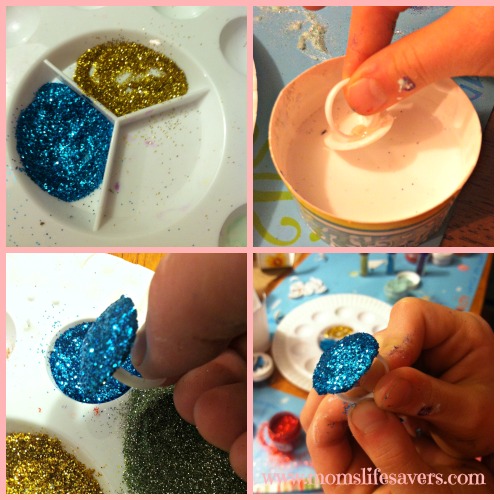
- While the hot glue is drying place the white/tacky glue into a shallow cup.
- Place the glitter onto a plate or into a shallow dish, use a different dish for each glitter color.
- Take a single ring and dip the cap into the glue, allow any excess glue drip back into the cup (Note: if there is too much glue on the ring the glitter and glue will just run off of the cap).
- Next, dip the cap into the glitter. Tap off any excess glitter and allow the ring to dry.
- Accessorize. After the rings have dried thoroughly, you can add gems or stickers to them using their adhesive backs or additional hot or white glue.
- Enjoy!
UpCycled Rings Tutorial Moms Lifesavers

Leave a Reply