
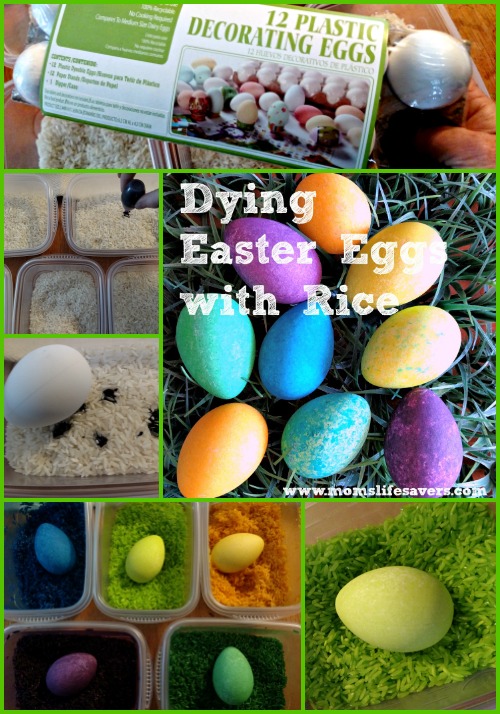
Dying Easter Eggs with Rice

We saw a how to on Facebook for dying Easter eggs with rice and had to see if it really was as easy as it looked. The answer, yes it is!
I was skeptical because dying eggs to me as a child meant strong smells of boiled eggs, vinegar and dye. Mom didn’t want those dissolving dye tablets on the table, our clothes or our hands – yikes.
At Mom’s Lifesavers we understand that making a mess is sometimes the best part of the process! Dying Easter Eggs with Rice though has a very high ‘fun’ ratio and a very low ‘mess’ factor.
What You Need
- For Dying Easter Eggs with Rice you will need the following:
- Food coloring – we used squeeze tubes in bright colors from McCormick
- Eggs – prep fresh eggs as you would for hardboiling or use plastic decorating eggs like we did
- Rice – approximately 1 cup per color
- Plastic containers with tight fitting lids
Steps
- Fill each container with rice – we used approximately a cup or 1/3 of the container. The egg does not need to be covered by the rice.
- Next we added a few drops of food coloring to the rice and an egg
- Place the cover tightly on the container and shake
- Continue shaking the container until the egg is the desired color you are looking for. Add additional food coloring if you need to.
- Remove egg from container and let dry – it should be pretty much dry to the touch – ours were.
- Mix it up – add the dyed egg to another container and repeat the process to get a different multicolored speckled look
Looking for another cool way to color eggs this season? Check out our post on using chalkboard painted eggs to decorate with – your tweens will have a blast making these.


Leave a Reply